





A photographer’s guide to capturing the living root bridges
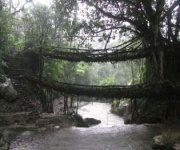
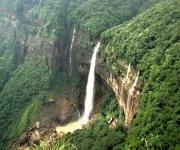
Cherrapunjee, also known as Sohra or Cherrapunji, gives photographers an unusually rich landscape to explore. Waterfalls plunge over limestone cliffs, clouds move across forested valleys, and ancient living root bridges blend human ingenuity with the growing strength of rubber fig trees. Every visit offers a different combination of light, mist, rain, and movement.
Photographing these bridges requires more than arriving with a wide-angle lens. The best images come from understanding the forest environment, allowing enough time for changing conditions, and treating the bridge as part of a living cultural landscape rather than an isolated landmark.
Sohra’s weather can shift within minutes, which is both a practical challenge and a creative advantage. A clear morning may become atmospheric by midday, while wet stone, dripping leaves, and diffused cloud cover can create depth that bright sunshine often hides. This rain lover’s guide helps set the scene for planning a weather-focused trip.
Read the light and weather
The living root bridges are usually surrounded by dense vegetation, ravines, and steep paths. Direct midday sunlight may reach only small sections of the structure, producing distracting patches of brightness. Overcast conditions are often more useful because they soften contrast and preserve detail in both the roots and the surrounding forest.
Mist can turn an ordinary composition into a quiet, layered image. Watch how it moves through the valley rather than treating it as a fixed background. A thin veil may separate the bridge from distant trees, while heavier fog can reduce the scene to a few strong shapes. Use a slower shutter speed to show moving mist as a soft wash, but keep enough definition in the roots to retain a sense of place.
Rain brings texture to almost every surface. Wet roots become darker and more graphic, moss appears more saturated, and small streams gain energy. Protect the camera between exposures, wipe the front element frequently, and look for pauses in the rainfall when the forest reflects light without being obscured.
Build a strong composition
A bridge should rarely be photographed as a simple front-facing subject. Its curves, openings, and irregular root patterns create natural leading lines. Stand at an angle to emphasize the bridge’s depth, or use the path approaching it to guide the viewer into the frame. A person walking across the structure can provide scale, provided the moment is respectful and permitted.
Look for layers: foreground leaves, the bridge in the middle distance, and a waterfall or wooded slope behind it. A wide lens can capture the environment, but stepping back before widening the view often produces a more balanced composition. Excessive foreground can make the bridge feel small, while a tightly framed image may lose the relationship between the structure and its forest setting.
Try several viewpoints before settling on the obvious one. Photograph from below if the terrain allows it, using the roots against a pale sky or misty canopy. From the bridge itself, focus on repeating textures and converging lines. A telephoto lens can isolate a knot of roots, moss-covered steps, or a person framed by an opening, creating a quieter interpretation of the site.
Scale is especially important at locations such as the Double Decker Living Root Bridge near Nongriat. The bridge’s size and elevation are easier to understand when a person is included, yet the image should avoid turning local residents or fellow visitors into unplanned props. Ask before making a portrait or directing someone’s position.
Choose practical camera settings
Humidity and rain affect equipment as much as they affect the landscape. Carry spare batteries in a dry pouch, use silica gel inside the camera bag, and avoid opening the battery or memory-card compartment while exposed to rain. When moving from a cool, wet environment into a warmer room, let the camera warm gradually inside a sealed bag to reduce condensation.
A tripod can be useful for deliberate compositions, especially when photographing streams, waterfalls, or mist at slower shutter speeds. Trails and bridge platforms can be narrow, so a compact tripod is usually more practical than a large studio-style model. A polarizing filter may reduce glare on wet leaves, though it can also remove reflections that communicate the dampness of the forest.
| Subject or situation | Useful starting point | Creative purpose |
|---|---|---|
| Person crossing the bridge | 1/250 sec, f/5.6, Auto ISO | Freeze movement while keeping the roots recognizable |
| Mist moving through trees | 1/15–1/60 sec, f/8 | Create gentle motion without losing structure |
| Small waterfall in low light | 1/2–2 sec, f/8–f/11, tripod | Smooth water and retain surrounding detail |
| Detailed root texture | 1/125 sec, f/4–f/5.6 | Isolate patterns with a softly blurred background |
| Broad forest scene | 1/60–1/250 sec, f/8 | Keep foreground and distant layers legible |
These settings are starting points rather than fixed rules. Review the histogram instead of trusting the brightness of the rear screen, which can appear misleading in a dark forest. Shoot RAW when possible so that shadow detail, muted highlights, and subtle green tones can be adjusted later without damaging the image.
Autofocus may hunt in fog or low contrast. Use a single focus point on a clear root edge or textured section of bark, then recompose if necessary. Manual focus is valuable for close details, particularly when leaves or fine branches move in front of the bridge.
Photograph the place with care
Living root bridges are still functional parts of local communities. They are routes, meeting places, and examples of knowledge passed through generations. Their roots continue to grow and strengthen, but they remain vulnerable to careless foot traffic, litter, and physical damage. A compelling photograph should never come at the cost of the subject itself.
Stay on established paths where possible, avoid climbing onto fragile side roots, and do not move stones, plants, or natural debris to improve a composition. Keep camera straps and tripods clear of walking routes. If the bridge is busy, wait for a natural gap rather than blocking others or asking people to stop repeatedly.
Portrait photography also benefits from local awareness. A nod or brief request may be enough for a casual image, while a more intentional portrait deserves clear permission. Learn a few local place names, listen to guides, and follow instructions from residents or site caretakers. Their knowledge can reveal viewpoints and stories that are invisible on a quick visit.
Plan time for changing conditions
A rushed day trip can produce attractive snapshots, but it leaves little room for waiting out rain, finding a better angle, or returning when the light changes. The walk to some bridges involves steep steps and uneven ground, so allow time for rest as well as photography. Comfortable footwear with reliable grip is essential, and lightweight rain protection is more useful than carrying too much equipment.
A longer stay also makes it easier to combine bridge photography with nearby waterfalls, caves, forest viewpoints, and village landscapes. The seven-day Meghalaya journey can provide a structured base for exploring Cherrapunjee while leaving room for changing weather and early starts.
Early morning is often ideal for quieter paths, softer light, and a greater chance of seeing mist settled in the valleys. Late afternoon can bring warm tones when clouds break, although forest trails become darker quickly. Check local conditions before setting out, especially during heavy monsoon periods, when water levels and trail conditions may change.
Rather than trying to photograph every attraction in one sequence, choose a primary subject for each outing. One walk might focus on broad environmental compositions, another on close details and abstract forms. This approach reduces fatigue and helps you notice smaller visual events: a drop collecting on moss, a shaft of light crossing the roots, or a bird moving through the canopy.
Pack for the forest
The best camera bag for Sohra is light, weather-resistant, and easy to carry on steep paths. A mirrorless or compact DSLR body with a versatile zoom lens can cover most situations, while a small prime lens adds value in dim forest interiors and for portraits. A macro lens is optional, but close-focusing capability is useful for moss, bark, fungi, and water droplets.
Keep memory cards and batteries in separate waterproof pouches. Bring a microfiber cloth, lens hood, rain cover, small headlamp, drinking water, and a basic first-aid kit. A dry bag inside the main backpack provides another layer of protection when rain becomes heavy. Avoid carrying every lens you own; changing equipment on a wet trail increases risk and slows the walk.
Useful field habits include:
- Carry two smaller batteries instead of relying on one fully charged battery.
- Use a rain sleeve or plastic cover that still allows access to essential controls.
- Pack a lens cloth in an outer pocket for quick cleaning between shots.
- Wear shoes with firm traction and keep both hands free on steep sections.
- Bring a compact notebook to record viewpoints, weather, and local place names.
Edit for atmosphere and detail
Post-processing should preserve the mood of the forest rather than make the image look artificially vivid. Begin with balanced exposure and gentle contrast. Recover highlights in pale mist, lift shadows carefully, and reduce green saturation if foliage overwhelms the bridge. A subtle increase in texture can reveal root patterns, but excessive clarity makes wet surfaces appear harsh.
Black-and-white conversion can work well for graphic studies of roots, steps, and fog. Color remains important for images where moss, red earth, blue-grey cloud, or warm skin tones establish the atmosphere. Create both versions when the composition supports them, then choose the treatment that best communicates the scene rather than applying the same preset to every frame.
Metadata and captions add value when images are shared. Identify the bridge accurately, credit local guides or communities where appropriate, and avoid presenting an ancient living structure as an abandoned relic. A clear caption can explain that the roots are trained and maintained over many years, connecting the photograph to the continuing traditions of Meghalaya.
Give yourself time to review images after the trip, when the visual experience is still fresh but the pressure of the trail has passed. Select photographs with varied perspectives: one environmental frame, one human-scale view, one detail, and one image that conveys weather. This creates a more complete visual story than a collection of nearly identical wide shots.
Reserve your travel and photography time through a Meghalaya itinerary that matches your pace, interests, and preferred weather conditions. Contact Cherrapunjee.net for tour and accommodation planning, then set out with protected equipment, patience, and respect for the communities that keep these remarkable bridges alive.